Friday, March 30, 2012


November 12, 2011
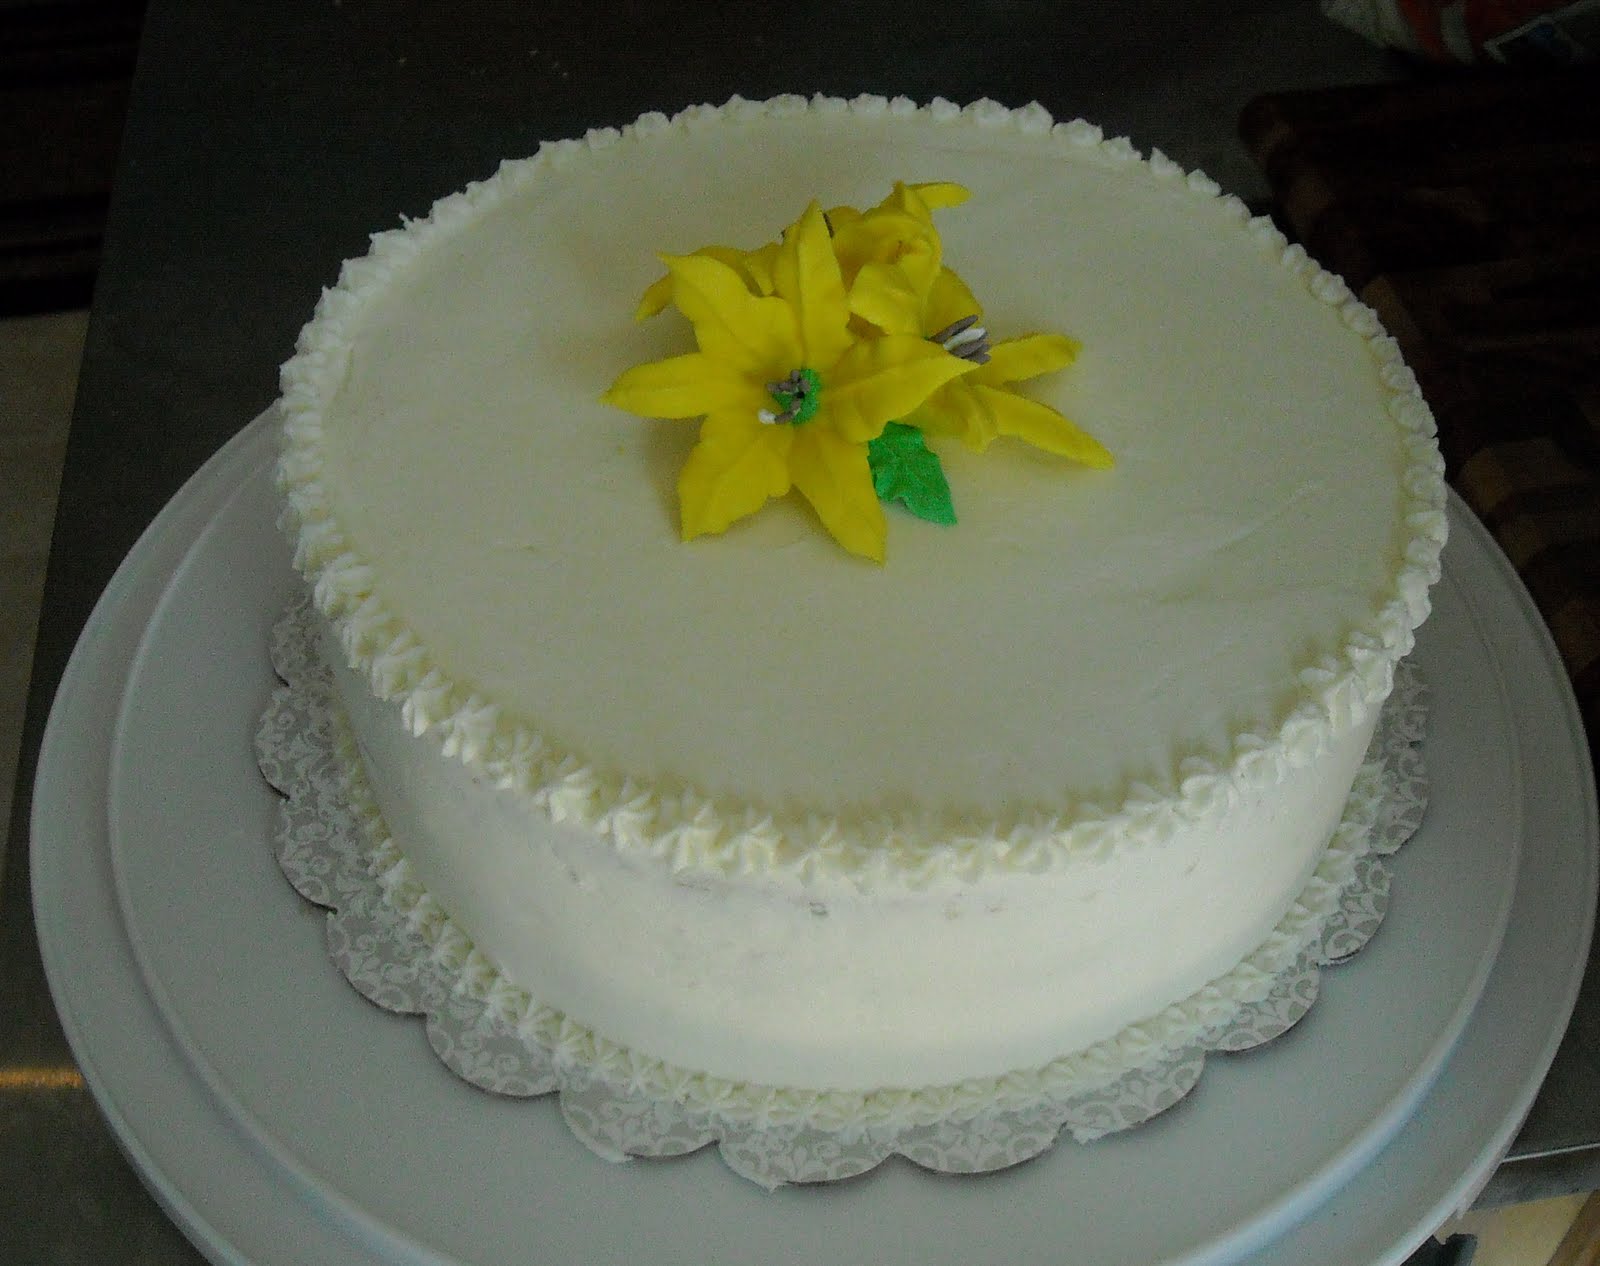
My good friend Tori entrusted me with making her wedding cake. YIKES! This was the result. (It tasted amazing, I thought, and many others told me the same.) Tori seemed very happy with it as well. Not too horribly shabby for my first AND LAST wedding cake. Took me 3 days, way too much time off work and money...so that was definitely my last. Too much stress too! It was quite an adventure, and I'm glad it's over. But I'm also glad I did it. Now I can say I once made a wedding cake.
Key word: ONCE!

Sunday, August 8, 2010

Dun Dun Dun....

Dun Dun Dun...or done done done? I'm thinking it's more like done done done...with my Wilton Cake Decorating Classes! HOORAY! And this was my final project. I need massive amounts of help learning how to cover square cakes with fondant, but I don't think I did too bad on my first try.


Friday, July 30, 2010

Wilton Cake Class!

So, long time no talk. But, I at least have a good excuse...I've been taking cake decorating classes at Michael's! These are a few of my creations. Don't judge me too harshly! The class had its ups and downs for sure. Flowers with petals and I are NOT friends. AT ALL. But, luckily I had a great teacher with a great sense of humor so we had some fun times.

This was cake One: We had to make a birthday cake and my puppy princess Lexi was turning 4 a week later so I put her name and age on it.

Cake Two: Roses. UGH....is the only thing I have to say about roses and flowers in general.

Cake Three: Father's Day cake (the inside was WAY more amazing than the outside). It was a white chocolate hummingbird cake!


Cake Four: Our final cake for course two....thank GOD lillies are so easy!


Cake Five: My little cousin Anna's 11th Birthday cake. I worked FOREVER on this and thought it turned out really well.

Stay tuned for cake Six...the FINAL course project!!!


Sunday, January 31, 2010

I'm Alive!

Yes, I'm still alive, I just haven't been blogging. No real excuses...I just haven't been doing it. I've been cooking and baking, but I haven't been taking pictures...because I wasn't blogging. I. AM. SORRRY.
These are a few of the things I made while I was on my "break"...

1) Crispy Peanut Buttter Eyeballs! I took these to work for Halloween and everyone went nuts! They turned out GREAT! I used my Gramma's Christmas cookie recipe for the cookie, which basically consists of butter, rice crispies and peanut butter. You roll all of those together into a ball, put in the freezer to harden and then dip them in "candy coating" (I think it's called Candi Kwik or something) and put them back in the freezer to harden. I then used the remaining candy coating and added blue food coloring for the iris and a chocolate chip that I had taken the point off of as the pupil. Once those were dry I used a little paint brush dipped in red food coloring for the bloodshot effect. They not only tasted great...they looked great!


2) Maple Pumpkin Pie! I followed this recipe for the pie and then used the Fall "pie crust cutters" from Williams Sanoma for a decorative edge! I brought it to Thanksgiving dinner and everyone raved about it and I must say, it looked very impressive! I think they were raving more about the look than the taste. It tasted great...but I wasn't overly impressed.


3) Candy Cane Cheesecake! I made this for Christmas, and forgot to take a picture of it so I'll post the one from the site. Mine looked almost identical on Christmas Eve...but on Christmas morning...it did not. Hint...the crushed candy canes will dissolve if you decorate the sides the night before. I guess this is a "do right before serving" kind of thing. So, I woke up to find that all the crushed candy had turned into a red gel/goo on the bottom of the cake carrier. *sniff* My family didn't seem to care...they ate every single bite and I must say, they loved it. I'll definitely make this again next year!


I honestly can't remember much else I made. I know I made a low-fat Orange Cream cake which was really good and some low fat blueberry brownies that SUCKED.


I promise I'll try to do better...but I'm not going to be able to do a weekly post. It's just not going to happen. lol.

Tuesday, November 10, 2009

It's NOT the Great Pumpkin, Charlie Brown!

I wanted to try my hand at another souffle! I felt such satisfaction when I made my last one...since I've heard they are quite tricky to make. And since October for me was "Pumpkin month" (yes, I know it is now November...I'm behind!)...I decided to make a pumpkin souffle!
This was my third try at beating egg whites into foam peaks. I think I'm getting pretty good at it! Some might even say...I'm a pro. ;-) Just kidding! But I'm pretty darn good.
I combined all other ingredients like the directions said...and because everyone that reviewed it said there was WAY too much orange zest (1 tablespoon), I halved it. I then VERY gently folded the "egg white foam" into the rest of the mixture, put it into one large souffle dish and popped it into the oven (might I add for quite a bit longer than the recipe called for)!
I pulled the beautiful souffle out of the oven and let it sit to harden and cool for a little while. It was absolute torture...I couldn't wait to eat the deliciousness!
Casey and I cut a slice...took a few pictures and took a bite!
IT WAS ABSOLUTELY DISGUSTING BEYOND ALL BELIEF!!! Even though I halved the orange zest...I probably should've quartered it or even less. It was OVERWHELMINGLY orangey and bitter. So...very...horrible.
NEVER EVER MAKE THIS! BLEHK!!!!!!

Sunday, November 1, 2009

Pumpkin Spice...is SO VERY Nice!

So, since I declared October "Pumpkin Month"...I wanted to find something super delicious and cute (and of course "pumpkin-y") to bring to work. I stumbled upon this recipe for Pumpkin Spice Cupcakes with Cinnamon Cream Cheese Icing and decided to make little fondant fall leaf/acorn "accents" to make the cupcakes even cuter! The day I found the recipe, I received a Williams-Sonoma catalog in the mail and found these "pie crust cutters"...which I thought would work perfectly with the fondant. Not only do they cut the shapes...they also imprint them as well! I headed to MacArthur Mall in Norfolk to the closest Williams-Sonoma and picked up these little $18.00 cutters (yes...I promise to use them more than once, Mom) and a few other cool items.

Since I wanted to make these cupcakes super cute, I wanted special cupcake liners! After going to Michaels, Ben Franklin and Wal-Mart...we finally found the PERFECT liners at "Factory Card Outlet". I was so very excited! I don't think anything that inexpensive has ever made me so excited. lol. Are these not the PERFECT liners? I think so!

I think this was the first time I've ever made cupcakes from scratch. Normally I just throw together a cake mix and pour the mix in the cupcake pan. Well NO WAY for these. These MUST be made from scratch! I threw all of the ingredients together as the directions said to do...and turned the mixer on high...and covered myself and the counter with the "dry mixture". Why, oh why...do I do these things? A SMART person starts on low....but I...do not. LUCKILY I had just cleaned the counters...so I just gathered the mess and threw it back in the bowl. lol. I didn't have enough ingredients to start over...and I figured...why not? I was hoping and praying that I didn't lose too much of the baking powder and soda that the cupcakes wouldn't rise or turn out.

I filled my new Williams-Sonoma Pancake Pen with the batter for the cupcakes. I figured the batter was about as thick as pancake batter so it would work. I was right...the Pancake Pen worked perfectly and made filling the cupcake liners a breeze! HOORAY!

I then popped the filled cupcake liners into the oven and to my surprise....they turned out wonderfully (although my cupcake liners absorbed some moisture from the cupcakes and turned kind of dark...boo!). I had just created 24 of the most AMAZING smelling cupcakes ever!

While the cupcakes were cooling, Casey kneaded and dyed the store-bought fondant (that's right...I BOUGHT it!). He rolled it out for me and then we went to cutting the shapes with the 18.00 pie crust cutters! They worked WONDERFULLY with the fondant...I was so excited! We made an even amount of each shape and set them out to harden overnight. (We also tasted one since we had never had fondant before, and let me say...I never want to have fondant again! GROSS!)

The next day, I made the cinnamon cream cheese icing that the recipe called for. This...was...some AMAZING stuff. I'm pretty sure it's Casey's new favorite icing! I first tried to ice the cupcakes with my pampered chef icing tool...and it was a big horrible mess. It took WAY too much frosting on each cupcake to make them look nice. Who wants THAT much frosting on a cupcake? Not me! I then scraped the icing off the one cupcake I tried and decided to do this step by hand. It definitely took awhile, but I suppose they turned out okay. I think it was much better this way...because the icing was so sweet, if I would've piled it on it would've overpowered the awesome tasting cupcakes! I then placed a dried "accent leaf/acorn" on each cupcake...and they were as cute as could be!

I packed them all up in my new cupcake carrier and couldn't wait to take them to work the next day. Once I arrived at work, I told everyone about the cupcakes and they were gone before lunchtime was even in sight. Everyone RAVED over these cupcakes! I am now being called "the Betty Crocker of Riverside". I'll take it. (Oh...and everyone took my suggestion and threw the fondant accents away! A few brave souls tried a bite...and then quickly discarded the accents as I suggested!)

Overall...this was a fairly easy recipe and it was definitely worth all the hunting for the perfect tools for the job. I couldn't have asked for a more perfect cupcake! (And PS: Amanda...seriously...how do you love making cupcakes so much? Icing them takes FOREVER! I think I'll stick with baking cakes and let you keep making your amazing cupcake creations!)

Tuesday, October 27, 2009

The UH-MAY-ZING-EST Cookies Ever!

Let me first start by telling Ginny THANK YOU for this recipe! It is my new favorite cookie ever. But then again...I love all things Pumpkin, and my favorite cookie is oatmeal chocolate chip. So basically...this is my heaven!

Ginny gave me her recipe for these cookies and the measurements were approximate. She eyeballs things. I was a little scared that the cookies might not turn out well...so I found this recipe that had exact measurements and was almost identical to Ginny's.
It was a pretty easy recipe...you just throw everything together and fold in the chocolate chips.
I used my new cookie scoop to scoop out uniform cookies!


Just pop in the oven and bake and you'll have the most AMAZING COOKIES EVER. Well, at least in my opinion. YUM YUM YUM! I took these to work and they were devoured! I also think these cookies would make an amazing muffin as well. The texture of the cookies was very muffin-like. I kept calling them "clammy". Next time I might make mini-muffins out of them. Mmmmmm....can't wait! ENJOY!